Sunday, February 14, 2016


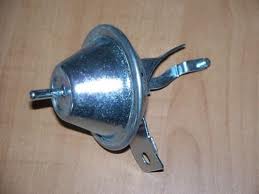
Like any other mechanical equipment, the fuel pressure regulator can also fail, leading to many problems. Here I’ll address several symptoms of a bad fuel pressure regulator.
1. Spark plugs blackened. Examine the end of a spark plug. If it has any sooty signs, it could direct to a bad fuel pressure regulator. Check the rest of the spark plugs. One sooty spark plug could just mean the engine is burning oil at that head.
2. The engine doesn’t run smoothly. If your engine is sputtering and spitting like it is going to die when it is at idle. Change your oil filter if you have a faulty one, otherwise check your fuel pressure regulator. In addition, if you have trouble in car starting, it could be the result of a bad fuel pressure regulator.
3. The tail pipe emits black smoke. Normally, your car should emit smoke of white or gray. If it is black, there is definitely something wrong with the fuel pressure regulator. Replace it.
4. The dipstick smells of gasoline. A faulty fuel pressure regulator can allow the gasoline to leak into the oil system. So if you smell fuel on the oil dipstick, it could be the sign of a bad regulator.
5. Gasoline drips out of the tailpipe. This could be the result of two causes-oil tank overfilling or a bad fuel pressure regulator. A bad fuel pressure regulator can allow the fuel to leak into the exhaust system.
6. Engine stalls. When you press on the gas pedal, your engine should react immediately. If you notice a little hesitation, check your fuel pressure regulator to see if there are any faulty signs.
7. Gasoline in the vacuum hose. To make sure that if it is due to a faulty regulator, remove the vacuum hose that attaches to the fuel pressure regulator, making sure the engine isn’t running. If your vacuum hose has any gas in it, your fuel pressure regulator is bad. On the other hand, if there is none in the line, but, when you turn the switch on, fuel drips out of the hose, it is bad as well.
8. Deceleration problems. A faulty fuel pressure regulator can cause an excessive load-up of gasoline, thus leads to an engine backfire or strong odor of fuel emissions when you decelerate your vehicle.
9. Bad fuel mileage. Another symptom that is easy to detect is an unforeseen drop in the mileage. You need to fill more fuel into the fuel tank compared to the amount you used to.
If you note these problematic signs that direct to a bad fuel pressure regulator, you can test the regulator to get a certain answer. The simplest is to scan your car’s computer for error codes by using a code scanning tool. When sensors in your car detect problems, they note this by sending a signal to your car’s computer. The scanning tools can read the codes and translate them into easy-to-understand explanations about what’s wrong with your vehicle. (
http://blog.autointhebox.com)

Saturday, October 17, 2015

Technology is a fickle friend, nudging us forward with one hand while charging exorbitant tolls with the other. Modern engines that impress us with power and efficiency are being decoupled from the manual transmissions that help them sing. Stout body structures guard us from peril in a crash but are so heavy and hard to see out of that we’re more liable to bump into hazards easily avoided by truly wieldy cars. Electronic stability and traction aids are wonderful except when there’s no way to disable them.

Electrically assisted power steering (EPS) is the latest technological cross we bear. Replacing hydraulic assist with a computer-controlled electric motor seemed like a reasonable idea when it first surfaced. Someday every car control will be by-wire; today’s EPS looks like a step in that direction. But in the past decade of driving EPS-equipped cars, we’ve found them lacking in feel, poorly tuned, and sometimes simply weird in comparison with the hydraulic-assist setups that have benefited from more than half a century of development.

This matters because steering is the driver’s main line of communication with the car; distortion in the guidance channel makes every other perception more difficult to comprehend.

Hydraulic Power Steering

The steering gear's internal cavity is divided into two chambers by a sealed piston attached to the rack. Applying pressurized hydraulic fluid to one side of the piston while allowing fluid to return from the other side to a reservoir provides steering assistance. A valve attached to the pinion shaft controls the hydraulic-fluid flow.

 Hydraulic Control Valve  Pinion Gear  Hydraulic Pressure/Return Lines


Electric Power Steering

To provide steering assistance, an electric motor mounted to the side of the rack housing drives a ball-screw mechanism via a toothed rubber belt. The screw engages a spiral cut in the outside of the steering rack. A torque sensor attached to the pinion shaft signals a control computer when to provide assistance.

 Pinion Shaft  Steering Torque Sensor  Rack-and-Pinion Housing  Electric Motor
 Ball-screw Mechanism  Steering Rack  Drive Belt


Tuesday, October 13, 2015


How they work, and how to repair them 

Contributed By: Enginebasics.com
Every car on the road since the invention of the combustion motor has used the motors vacuum to perform many functions, but just how does it work?
A motor can be looked at as a giant air pump. The bigger the pump, the more power it makes. Also, the more efficient the pump, the more power it makes. A motor is constantly moving air in and out of itself. The Vacuum that a motor produces comes from the intake stroke of the motor where the crankshaft draws down the piston and air is pulled or “sucked” into the motor. In this situation, if the throttle butterfly is open, not much vacuum is produced since you are freely letting the air flow into the motor. Take that same situation when the throttle plate is closed and the motor will be generating a lot of vacuum as it struggles to suck as hard as it can to pull in air and feed itself passed the closed throttle plate.
One thing important to understand then, is that vacuum will only be present BEHIND that throttle butterfly. In front of the throttle plate there will be no vacuum present due to the fact that it is open to the air box and therefore atmospheric pressure. Also remember that the amount of vacuum a motor will have will be based on how good the piston rings are, and also the cam that the motor is running. Having a good seal from the piston rings most people understand, but when running a very large and aggressive cam, often there will be more overlap in the duration between intake and exhaust valves that will cause a loss of vacuum at idle. This loss of vacuum causes the motor to struggle when idling at low RPM’s. 

So why do I have so many vacuum lines coming off the intake manifold?

Well, this is because that is where the vacuum is present. Since the intake manifold represents the area behind the throttle plate, the highest vacuum that the motor produces will be found in the intake manifold. Because of this, the intake manifold will often have many vacuum outlet ports found on it.

Some custom application intake manifolds or those manifolds equipped with individual throttle bodies, do not have enough room to accumulate sufficient engine vacuum. Also these custom manifolds are installed in such a tight place they don’t have room to have many vacuum ports welded on. The solution is a Vacuum Accumulator, or what are also called Vacuum Boxes. These basically function as remote reservoirs for vacuum to accumulate. There added feature is that they can be mounted anywhere and can therefore be mounted in a space that is free in the engine bay.

Vacuum Controlled Devices on a Vehicle

While almost everything on an automobile used to be vacuum controlled through the use of a diaphragm and actuator, many of these important jobs are being passed on to be electrically controlled now, but every car manufacturer is different.

Automotive Vacuum Systems 

Vacuum Diagram Engine Repair BlockVacuum Diagram Engine Repair Block

How they work, and how to repair them 

Contributed By: Enginebasics.com
Every car on the road since the invention of the combustion motor has used the motors vacuum to perform many functions, but just how does it work?
A motor can be looked at as a giant air pump. The bigger the pump, the more power it makes. Also, the more efficient the pump, the more power it makes. A motor is constantly moving air in and out of itself. The Vacuum that a motor produces comes from the intake stroke of the motor where the crankshaft draws down the piston and air is pulled or “sucked” into the motor. In this situation, if the throttle butterfly is open, not much vacuum is produced since you are freely letting the air flow into the motor. Take that same situation when the throttle plate is closed and the motor will be generating a lot of vacuum as it struggles to suck as hard as it can to pull in air and feed itself passed the closed throttle plate.
One thing important to understand then, is that vacuum will only be present BEHIND that throttle butterfly. In front of the throttle plate there will be no vacuum present due to the fact that it is open to the air box and therefore atmospheric pressure. Also remember that the amount of vacuum a motor will have will be based on how good the piston rings are, and also the cam that the motor is running. Having a good seal from the piston rings most people understand, but when running a very large and aggressive cam, often there will be more overlap in the duration between intake and exhaust valves that will cause a loss of vacuum at idle. This loss of vacuum causes the motor to struggle when idling at low RPM’s. 

So why do I have so many vacuum lines coming off the intake manifold?

Well, this is because that is where the vacuum is present. Since the intake manifold represents the area behind the throttle plate, the highest vacuum that the motor produces will be found in the intake manifold. Because of this, the intake manifold will often have many vacuum outlet ports found on it.
Vacuum Diagram Engine Repair Block


Vacuum Accumulator / Vacuum Box

Vacuum Diagram Engine Repair Block
Some custom application intake manifolds or those manifolds equipped with individual throttle bodies, do not have enough room to accumulate sufficient engine vacuum. Also these custom manifolds are installed in such a tight place they don’t have room to have many vacuum ports welded on. The solution is a Vacuum Accumulator, or what are also called Vacuum Boxes. These basically function as remote reservoirs for vacuum to accumulate. There added feature is that they can be mounted anywhere and can therefore be mounted in a space that is free in the engine bay.

Vacuum Controlled Devices on a Vehicle

While almost everything on an automobile used to be vacuum controlled through the use of a diaphragm and actuator, many of these important jobs are being passed on to be electrically controlled now, but every car manufacturer is different.
Vacuum Diagram Engine Repair Block
List of common Vacuum controlled Devices: 
1. Exhaust Gas Re-circulatory Valve ( EGR ) 
2. Brake Booster 
3. Exhaust By-pass Valves ( like those found on Ferrari’s ) 
4. Pop up Headlights
5. Cruise control
6. Crank Case/ Valve Cover Vent
7. Heating / A/C Vent Controls
Now that is not a complete list as there are many things over the years that vacuum has controlled in the vehicle. 

Common Problem / Repairs 

The biggest problem with the vacuum system in any motor is LEAKS! With any vacuum system it’s leaks that occur in the system that cause so many headaches to car owners. This nice thing is that to fix this type of problem is very cheap. The bad news is that they can be very difficult to track down. There are a few tools to help find the leaks in your vacuum system though.
1. Vacuum Diagram found in the Factory Service Manual ( FSM ) 
2. Can of starter fluid
3. Vacuum Pump
4. Your Mouth or another pressure source

Using the Factory Service Manual

When it comes to tracking down leaks, having a diagram of your engine bay will be vital to you saving yourself some time. Every service manual should have a section on the vacuum set-up of your car. Finding this can be tricky, but try checking the index or the emissions section if the index leads you no-where. If you cannot pick up a Haynes Manual or Factory Service Manual, your next best thing is going to be tracing all the vacuum lines yourself and making a diagram. 

Can Of Starter Fluid 

Using starter fluid is the oldest trick in the book for finding a vacuum leak. With the engine idling, take your can and spray down the vacuum lines and listen for the engine’s idle to change. When you hear the motor come off idle, and rev up slightly, you have got your leak. Obviously this method doesn’t work if your leak is causing your motor idle to really high, or your motor to idle erratically. Also if the leak is VERY small this method will not work, as the amount of starter fluid pulled into the intake will not be enough to affect the idle of the vehicle. This method has worked time and time again as a quick way of finding the leak.

Vacuum pump

My personal favorite if you have the tool. I like to take each individual vacuum line off of the intake manifold and pull it down to 30 mm HG of vacuum and then leave it there for around a minute. If the line holds, then I move on to the next. Not only is this method incredibly accurate, it can find even the smallest of leaks that you didn’t even know you had. Many times I find a leak and fix it, only to find that it didn’t cure my original problem. Meaning the leak was so small that I couldn’t notice it, but I feel that keeping a motors intake tract nice and tight is the best thing for any motor. 

Your Mouth or Another Pressure Source 

With forced induction cars this method could be argued as the best. Since these cars will see both vacuum and pressure in there intake tracts, and manifolds, its best to check all lines for both vacuum and pressure leaks. The reason being that these types of cars are set-up with one way flowing valves ( check valves ) that can often be the problem, but the only way to know is by checking them at both vacuum and pressure. The 3rd gen Mazda RX7 had several one way check valves at various locations in its vacuum/pressure line tract. Also, it is usually with forced inducted cars that you will come across the most problems with vacuum/pressure leaks do to the extra heat a forced inducted application presents, and the extra amount of rubber or silicon hoses that need to be run. All that heat causes many of the hoses to crack over time, and finding those small cracks on the hoses can be tedious work. 
While your mouth can provide some pressure to check things, it is best to use a hand pump that can check both vacuum and pressure, or use an air compressor with the proper fittings. 

Summary

This is just a small look at the vacuum system of a motor, but hopefully this gives you an idea of how it works, and some ideas on how to track down and repair any problems that may arise because of it.

Wednesday, October 7, 2015

1- How does the coolant temperature sensor "CTS" work? 
 The coolant temperature sensor is a thermistor ( a resistor which varies the value of its voltage output in accordance with temperature changes. ). The change in the resistance values will directly affect the voltage signal from the water thermosensor. As the sensor temperature decreases, the resistance values will increase. As the sensor temperature increases, the resistance values will decrease.
The coolant temperature sensor lets the engine control computer know what the engine temperature is by gathering  information from the engine coolant temperature.
 The most common coolant temperature sensor location is near the thermostat housing, sometimes the computer uses the same sensor to operate the temperature gauge in your instrument cluster, depending on the car make and model.

 If your vehicle is equipped with what seems to be two coolant temperature sensors , your car has a coolant temperature sensor and a coolant temperature sending unit, the coolant temperature sending unit operates the temperature gauge in your instrument cluster and the coolant temperature sensor sends the signal to the engine control computer to transmit the correct engine temperature, the way to recognize which one is  the sending unit and which one is the actual coolant temperature sensor is to unplug the electrical connector and see how many wires are attached to it, the CTS has two terminals, while most temperature sending units only have 1. 

2- How do I know if the coolant temperature sensor in my car is bad?

  There are several ways to know if the coolant temperature sensor is malfunctioning, if the sensor is bad it will trigger a trouble code and the check engine light in the dashboard will come on, you can retrieve the engine code and see if it is related to the coolant temperature sensor, even if the engine control computer doesn't store a trouble code, there is another way to suspect a bad coolant temperature sensor : If your vehicle starts using more fuel than usual, starts having trouble starting when the engine reaches normal operating temperature or you notice black smoke coming out from the exhaust tail pipe, it is very likely that these symptoms are related to a bad coolant temperature sensor. We have included in this page  detailed information enhanced with pictures about how to diagnose and replace a bad coolant temperature sensor.  (http://www.howstuffinmycarworks.com/CTS_coolant_temp_sensor.html)

Monday, October 5, 2015

camshaft sensor is an integral part of the modern automobile. It is one of the devices that help the engine run smoothly. The camshaft sensor is located in the hood, beside the engine. However, it isn’t always easy to find it. This is because the exact position of the camshaft sensor depends on the car brand. That said; whichever the car, you’ll find the camshaft sensor in either one of three locations: by the side of the engine block, behind the cylinder head, or in the car’s lifter valley.
The camshaft sensor is a small, but significant, magnetic device. It gathers and sends information about the car’s camshaft speed (and as a result the position of each piston) to the car’s electronic control module. This information is received by the computer, which then uses this data to further calculate the time of ignition and the timing of fuel injection required by the engine. This information is vital for engine function.
At times, either due to accidents or due to wear and tear, the camshaft sensor can weaken. In the case of a camshaft sensor failure, the weak or disrupted signal is interpreted by the computer as a problem, and this affects the proper running of the vehicle. A failing camshaft sensor can be identified based on any one of the 3 following symptoms.

1. "Check Engine" Light

The first symptom of a failing camshaft sensor manifests as a warning from the car’s control module. As the camshaft sensor fails, the computer sends the driver a warning sign via the “check engine” light on the car’s dashboard. When the check engine light first comes on, the driver has enough time to service the car and replace all faulty parts, including the failing camshaft sensor. However, if you ignore this flashing light for a considerable time, it could later lead to severe engine trouble. 

2. Disrupted Driving

Another symptom of a failing camshaft sensor is experiencing constant disruption while driving. If you are experiencing symptoms like frequent stalling, poor idling of the car at 500 to 600 rpms, a massive drop in the rpms slowing down the car to a crawl, a noticeable drop in engine power, poor mileage, abnormal acceleration activity, frequent stumbling, etc., it probably means you have a failing camshaft sensor that needs immediate attention. If you are experiencing these symptoms, it is best to seek a mechanic before the situation gets worse and the car gives up, refusing to start at all.

3. Ignition Trouble

If you ignore all of the above symptoms, you end up with one that really can’t be ignored—no ignition. Remember, as the sensor begins to weaken, so does the signal it transmits to the car’s computerized control station. If you let the problem carry on for too long, the engine will suffer from a “no spark” situation. Once the signal switches off, so will your engine, thereby stranding you. Thus, it is best not to let your car get to this stage. 

Friday, September 25, 2015

Exhaust Color Diagnosis 

Exhaust color diagnosis.
Blue/Gray Smoke: Blue/gray exhaust smoke is an indication of oil burning in the combustion chamber. These are possible symptoms and causes:
Valve Seals: Leaking valve seals will cause blue/gray exhaust smoke.
Valve Guides: Excessive clearance between the valve stem and the valve guide allows oil to leak past the gap into the cylinder.
Piston Rings: Worn or damaged piston rings will cause blow-by, resulting in blue/gray smoke.
Worn Cylinder Walls: Worn cylinder walls cause blow-by, resulting in blue/gray smoke.
PCV System: A stuck closed PCV valve causes excessive crankcase pressure, resulting in blue/gray smoke.
Black Smoke: Black exhaust smoke is an indication of a rich fuel condition. These are possible causes:
Fuel Injectors: A leaking or dripping fuel injector will cause a rich fuel condition.
Fuel Pressure Regulator: A stuck closed fuel pressure regulator will cause a rich fuel condition.
Fuel Return: A restricted fuel return line will cause a rich fuel condition.
White/Gray Smoke: White exhaust smoke is an indication that coolant is burning in the combustion chamber. These are possible causes:
Cylinder Head: A crack in the cylinder head (around the coolant jacket) will cause coolant to enter the combustion chamber.
Engine Block: A crack in the deck of an engine block near the coolant jacket will cause coolant to enter the combustion chamber.
Head Gasket: A damaged or blown head gasket will cause coolant to enter the combustion chamber resulting in white/gray smoke coming from the tailpipe.

Sunday, September 20, 2015

Hybrid-electric vehicles (HEVs) combine the benefits of gasoline engines and electric motors and can be configured to obtain different objectives, such as improved fuel economy, increased power, or additional auxiliary power for electronic devices and power tools.
Some of the advanced technologies typically used by hybrids include
  • Regenerative Braking. The electric motor applies resistance to the drivetrain causing the wheels to slow down. In return, the energy from the wheels turns the motor, which functions as a generator, converting energy normally wasted during coasting and braking into electricity, which is stored in a battery until needed by the electric motor. 
  • Electric Motor Drive/Assist. The electric motor provides additional power to assist the engine in accelerating, passing, or hill climbing. This allows a smaller, more efficient engine to be used. In some vehicles, the motor alone provides power for low-speed driving conditions where internal combustion engines are least efficient.
  • Automatic Start/Shutoff. Automatically shuts off the engine when the vehicle comes to a stop and restarts it when the accelerator is pressed. This prevents wasted energy from idling.(www.fueleconomy.gov)
Subscribe to RSS Feed Follow me on Twitter!